Chapter 4: Read a melody, then sing it
Chapter 4 Introduction
Sight-singing and sight-reading are essential skills for musicians. When you play something “at sight” or “from sight”, it means you look at the musical score, then perform, with no rehearsal and no chance to hear the music played for you ahead of time. Since this is a taxing and difficult skill, it is often used during auditions and to assess musical ability. In some professional contexts, you might even be expected to perform melodies or music from sight with high accuracy. This often happens while accompanying for auditions or rehearsals, working as a session musician, or other contexts where musicians are expected to generate professional performances with little to no rehearsal.
In this chapter, you’ll be practicing how to read a melody first, then sing it. The purpose of this is to help you build a connection between the musical notation that you see on the page and the music you create out loud. The stronger the connection you’re able to make, the more quickly you’ll be able to create an artistically interesting performance. Sight-singing and sight-reading take tremendous amounts of practice for most musicians to master. In fact, some professional musicians are not skilled sight-singers or sight-readers. Don’t worry if you struggle with this skill at first. Instead, focus on how well you’re able to connect what you see on the page and the sound you’re able to imagine.
Chapter 4 Challenge – preparing for performances
In many musical contexts, musicians are working from musical scores. When preparing for performances, every minute of practice or rehearsal time counts. Many professional musicians plan their rehearsal or practice sessions down to the minute. In these cases, being able to quickly gain a sense of how to turn musical notation into sound can be a huge timesaver. As you work to build the skill of sight-singing, think about how you could use this in your own practice. Instead of having to listen to a recording or have your teacher play a passage, imagine if you could hear it in your mind?
Chapter 4 Goals
By the end of this chapter, you should be able to:
- Annotate a score using solfege syllables
- Annotate a score using rhythm markings
- Read and perform notated rhythms to an internal steady beat in simple and compound meters
- Sing melodies notated in bass and treble clef, with expression
- Sing short, major melodies in duple, triple, and quadruple meters while conducting
Section 4.1 – Annotating a score
Before you sight-sing a musical example, you should take time to study the score. Start by familiarizing yourself with everything on the page, making note of any symbols or words you’re not sure of. Then, annotate the score with the counts and the solfege. This will help you make a connection between the music notation and the sound of the melody and rhythms. Many people continue to annotate scores throughout their professional careers
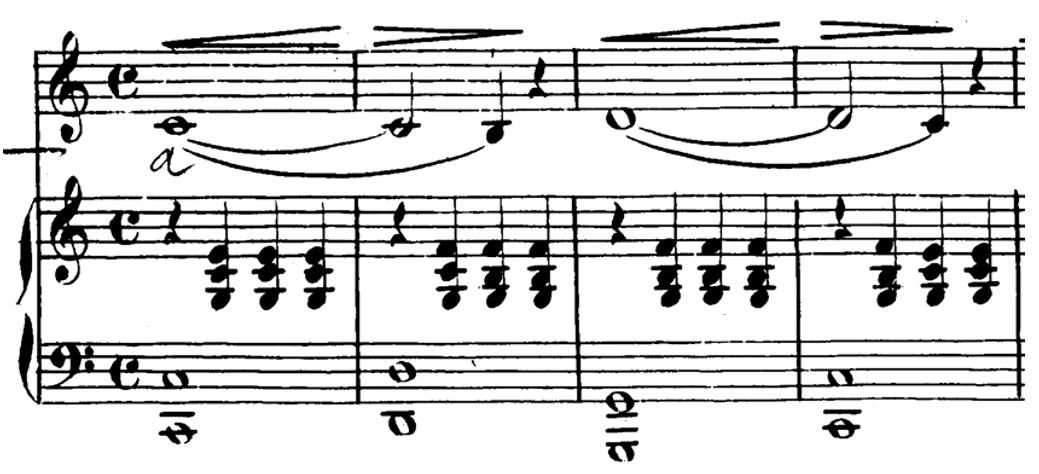
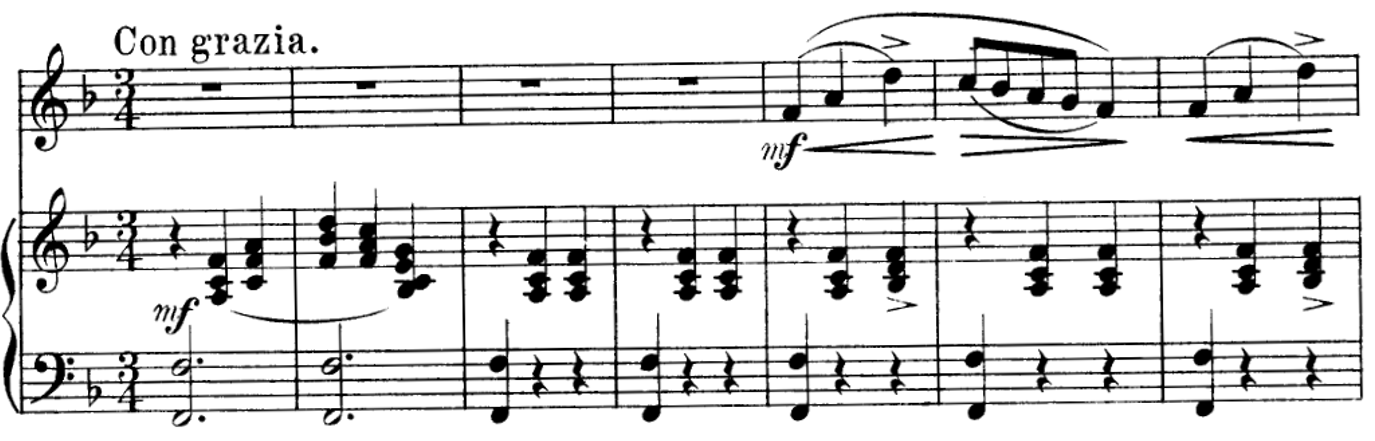
Example 4.1.1 – No 1 Op. 5 24 Vocalises by Mathilde Marchesi
Add solfege and counts to the example below:
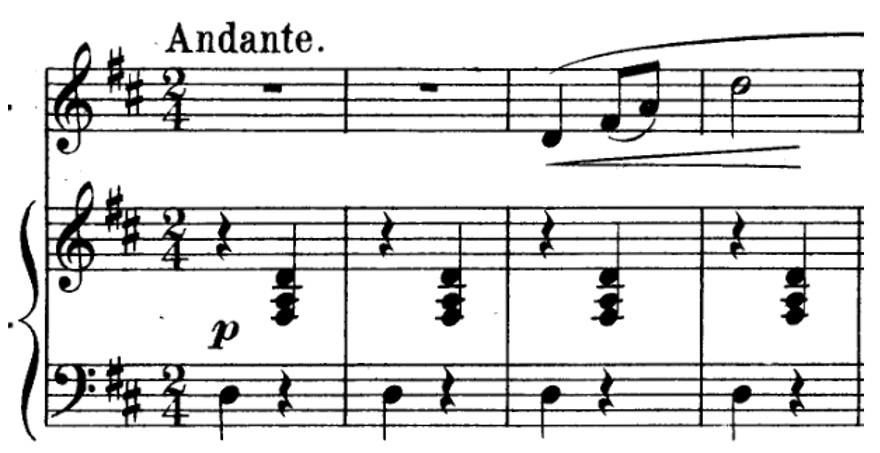
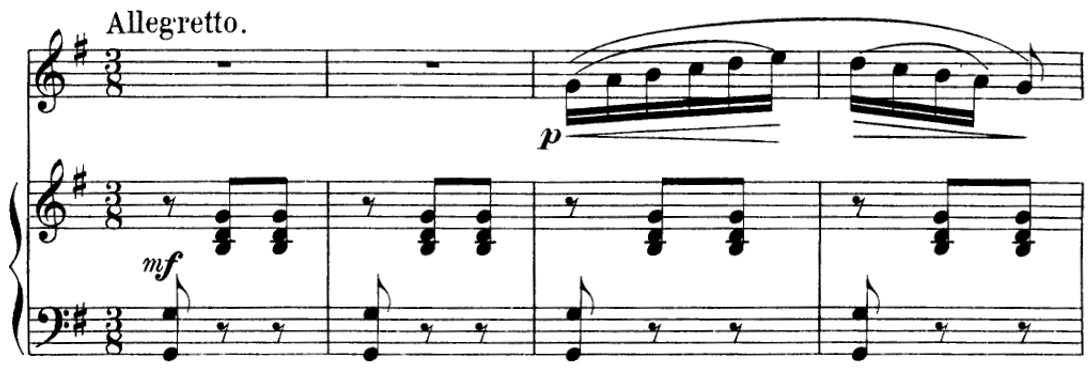
Example 4.1.2 – No 2 Op. 32 30 Vocalises by Mathilde Marchesi
Add solfege and counts to the example below:
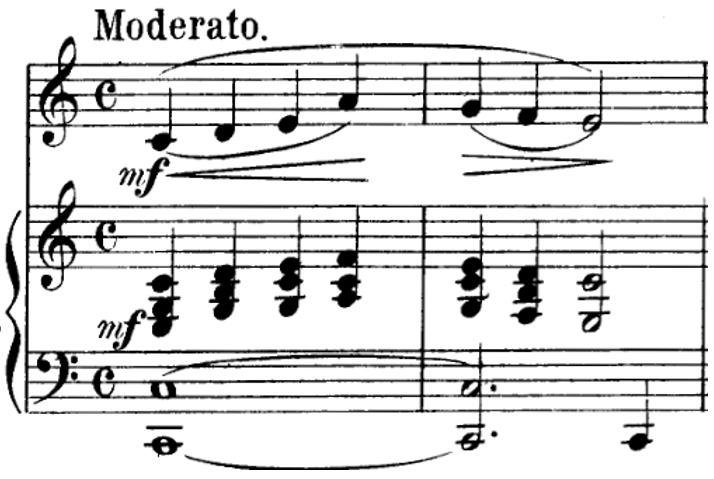
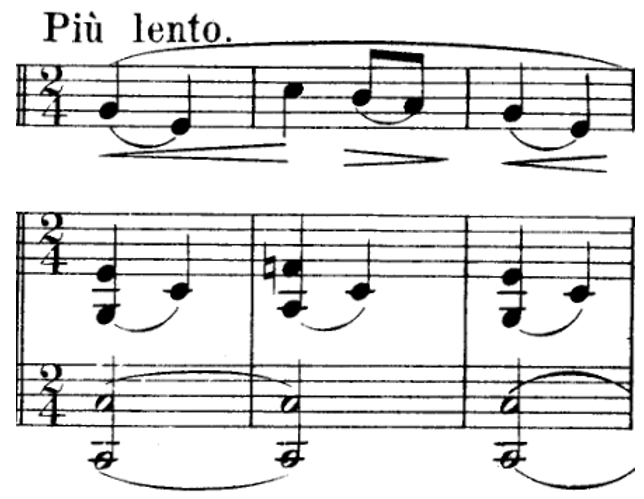
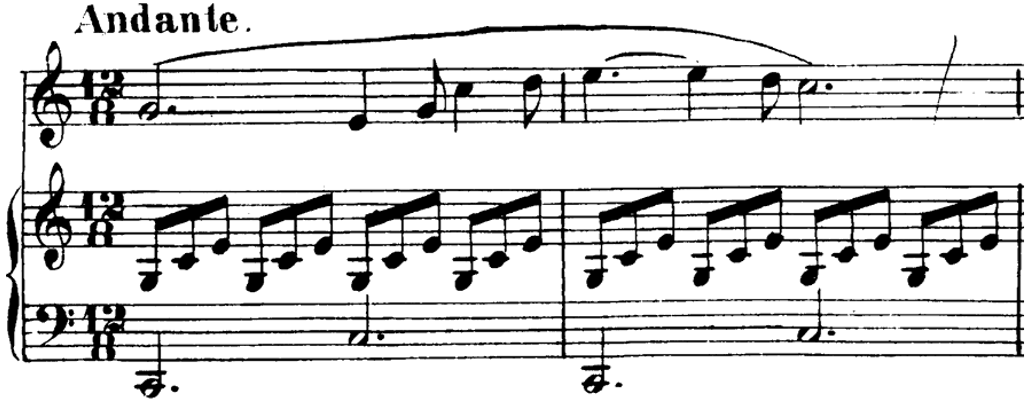
Example 4.1.3 – No. 3 Op 32 30 Vocalises by Mathilde Marchesi
Add solfege and counts to the example below:
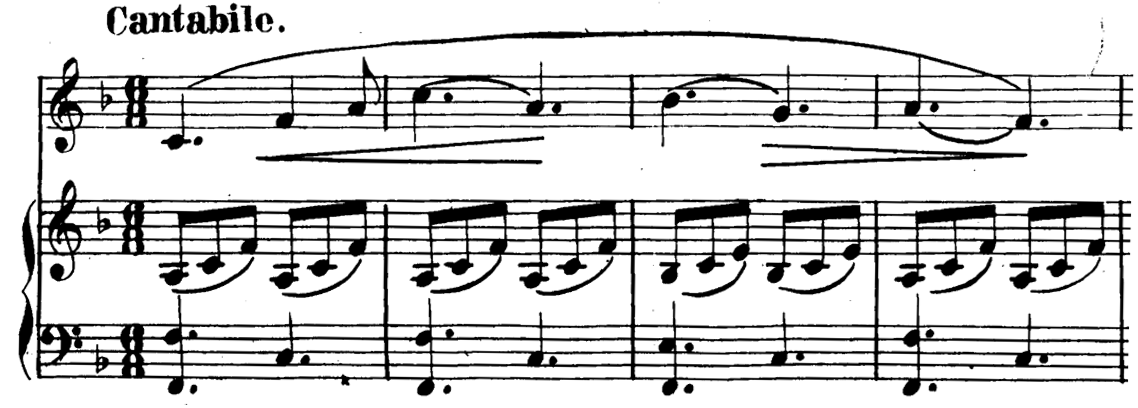
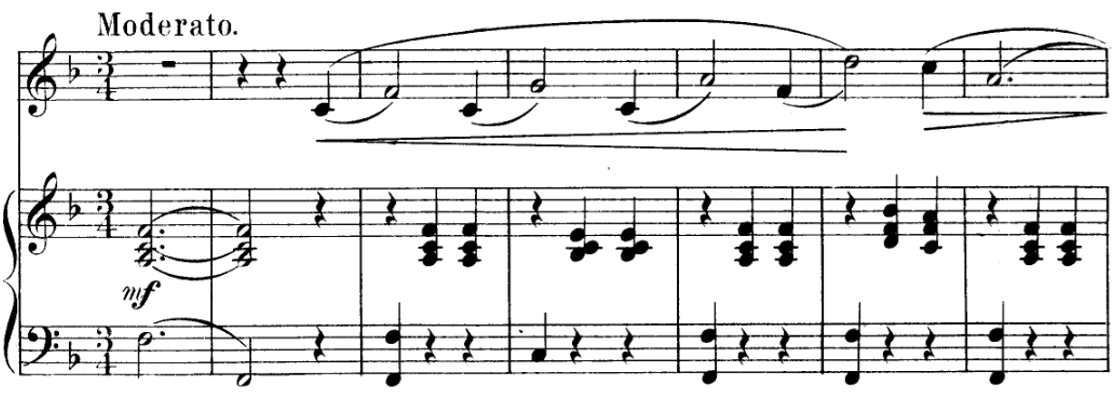
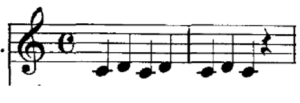
Example 4.1.4 – No. 4 24 Vocalises by Mathilde Marchesi
Add solfege and counts to the example below:
Section 4.2 – Using the beat to perform rhythms
Sight-reading rhythms can be a challenging task for many musicians. In this text, we’re going to approach reading rhythms using the beat as the organizing principle. How do we use the beat to perform rhythms? How do we organize rhythms around a beat, exactly? Well, let’s break this challenge into manageable steps.
- Before sight-reading rhythms, take some time to practice clapping a steady beat. Make it fast. Make it slow.
- Then, listen to some music. Find the beat and clap along. Try this with different tempos and styles.
- When sight-reading, start by identifying which duration gets the beat in the score. First, use the time signature to determine if the meter is compound or simple. Second, use the time signature to determine how many beats per bar (usually two, three, or four).
- Above each measure, write the number of beats and the parts of each beat. This often looks like “1 + 2 + 3 + 4+”
- Clap a steady beat while following along with the score. The goal is simply to practice keeping pace while reading.
- Once you have a good idea of where the beat falls, map the individual rhythms to the beat (or division of the beat). Oftentimes people will simply circle the counts they’ve already written above each measure.
- Going as slowly as you can, use your map to clap the rhythms along to a steady beat. Slowly means very, very slowly. For example, if the tempo of the example is Andante, try setting a metronome to 60 BPM. Then, match the metronome pulse to the sixteenth note. This means that each beat is four seconds long. Going slowly can help you more steadily build competence, which leads to confidence.
One of the most challenging aspects of sight-singing is maintaining a steady beat. The beat is the pulse we clap or tap our feet along with. In the examples below, start by notating the beat on the score. You can do this by writing numbers above each melody. Then, count out loud while following along with the score. Sometimes, it helps to point to the score with your finger or a pencil. You can also use music notation software for this task, as long as you mute the sound. Don’t worry about singing the pitches at this point. You can say “dah” for each pitch or say the name of the solfege syllable out loud.
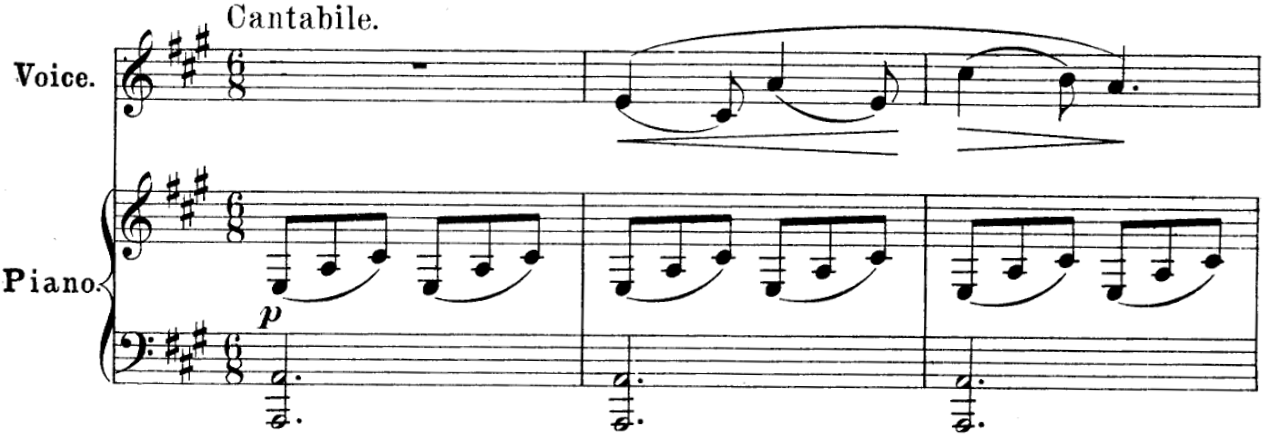
Example 4.2.1 – No. 4 Op 32 30 Vocalises by Mathilde Marchesi
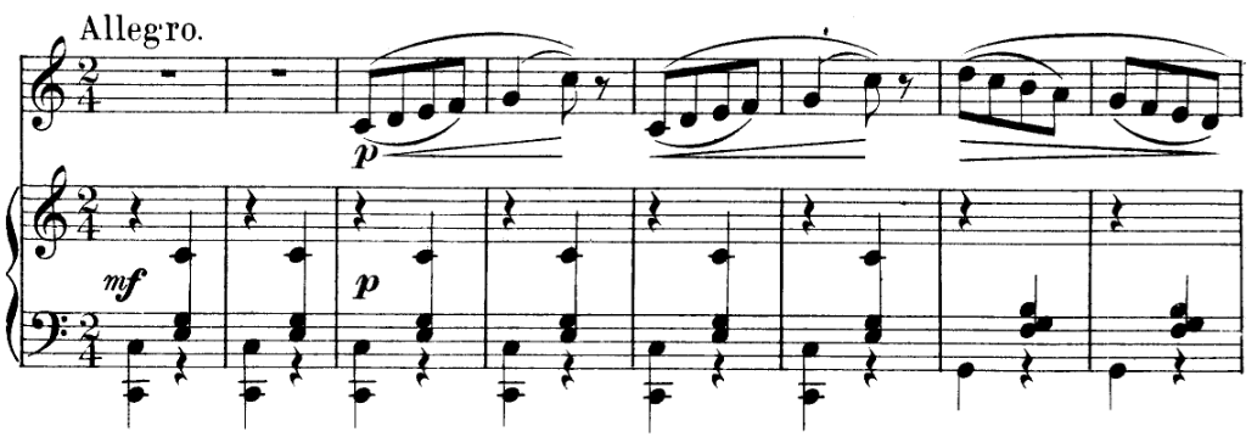
Example 4.2.2 – No. 5 Op 30 30 Vocalises by Mathilde Marchesi
Example 4.2.3 – No.6 Op 30 30 Vocalises by Mathilde Marchesi
Example 4.2.4 – No. 8 Op 30 30 Vocalises by Mathilde Marchesi
Section 4.3 – Using solfege syllables to sing melodies
In this section, you’ll use solfege syllables to sight-sing melodies. Don’t worry about the counts or timing just yet, we’re just focusing on the melodic pitches at this point. Start by reviewing the solfege syllables and Curwen-Glover hand signs, if your instructor is using them. In each example, you should also make sure you know all of the pitches in the key. It can help to make a table that helps you match each note in the scale to the correct solfege syllable. Next, write the syllables that match up with the melody below or above the staff. Take a few minutes to warm up your voice and practice singing up and down a major scale. Try adding in the solfege syllables while you do. Then, read through each melody, saying the solfege syllables in your head. Try imagining the sound of each syllable. Finally, try singing the solfege syllables out loud on the correct pitches.
If you encounter a leap that you’re not sure about, trying singing step-wise up or down to find the correct sound. Keep rehearsing in your imagination until you’re confident. This may take you several minutes or even several practice sessions. Once you feel confident, sing each pitch with intention, taking as much time as you need to get to the next pitch. The goal is to link your ability to read musical notation with your ability to imagine sound. Go slow and try and be patient. Make sure to celebrate your successes, even if they feel small!
Example 4.3.1 – No. 9 Op 30 30 Vocalises by Mathilde Marchesi
Example 4.3.2 – No. 11 Op 30 30 Vocalises by Mathilde Marchesi

Example 4.3.3 – No. 12 Op 30 30 Vocalises by Mathilde Marchesi
Example 4.3.4 – No 17 Op 5 24 Vocalises by Mathilde Marchesi
Section 4.4 – Conducting while singing (part 2 of 2)
In this section, you’re going to use your conducting skills to help you keep a steady beat while sight-singing. At first, you’ll just move your hands in time with the music. Then, you’ll gradually try moving through the conducting pattern while singing. The goal is to help you connect what you see on the page to the movement of your body. To accomplish this, you’ll need to break down the big challenge into a set of smaller tasks. Then, you’ll want to practice each task individually, then in pairs, then all together. It may seem painstaking or even tedious at first, but the goal is to go slowly enough that you build confidence and avoid getting frustrated. Make sure to take plenty of breaks and celebrate your successes as you go.
Preparing to conduct while singing:
- Annotate the rhythms. Then, say/tap the rhythms out loud
- Annotate the solfege syllables. Then, sing the solfege syllables, not in time. This may take a few tries.
- Conduct silently along with the score
- Conduct while saying/tapping the rhythms out loud
- Say the solfege syllables along with the correct rhythms. Then, sing them.
- Sing the solfege syllables while conducting slowly, keeping the tempo flexible. Don’t worry about keeping beat steady, simple try and line up each syllable with the correct part of the conducting pattern
- Practice conducting the melody while singing the syllables, in time, in your imagination. Once you feel confident, try singing the melody out loud while keeping a steady beat
After you’ve completed the steps above, try singing the example below while conducting.
Example 4.4.1 – No. 12 Opus 21 The Art of Singing by Mathilde Marchesi
Example 4.4.2 – No. 13 Opus 21 The Art of Singing by Mathilde Marchesi

Example 4.4.3 – No. 14 Op 21 The Art of Singing by Mathilde Marchesi
Example 4.4.4 – No. 14 Op 21 The Art of Singing by Mathilde Marchesi

Practice check in
This is the third practice check in. As you did in the last chapter, take a few minutes to reflect on your practice over the last week. Then, compare what you wrote to the last chapter and the introduction. The purpose of this exercise is to help build the habit of reflecting upon your practice. As you progress through your musical career, reflection can help you determine what’s working or not working in your practice and what could be improved. Make sure to include musical play and exploration as part of your practice.
As you did in the last chapter, take a few minutes to reflect upon how you’ve used any feedback you’ve received. Feedback is essential to the learning process for most people. You can think about what feedback was helpful as well as the kind of feedback you find most helpful. Some people like to hear something explained in words. Other people find illustrations or diagrams more helpful. The more you can learn about the kind of feedback you need and how you can use it, the better you’ll be able to improve your musical practice.
